Making a Doll Condo from a 13" Cube Shelving Unit
It can be difficult to find the right height shelves when collecting ~12" dolls such as Barbie, but I found some luck with Target's Brightroom Storage Cubes (or alternatively, Walmart's Better Homes and Gardens units) that have enough depth to create a room and host a few posed dolls per level. They are available in a number of configurations such as 2-, 4-. and 6-cube options, but for the purpose of this project I will focus on the 2 cube shelving unit in a vertical orientation.
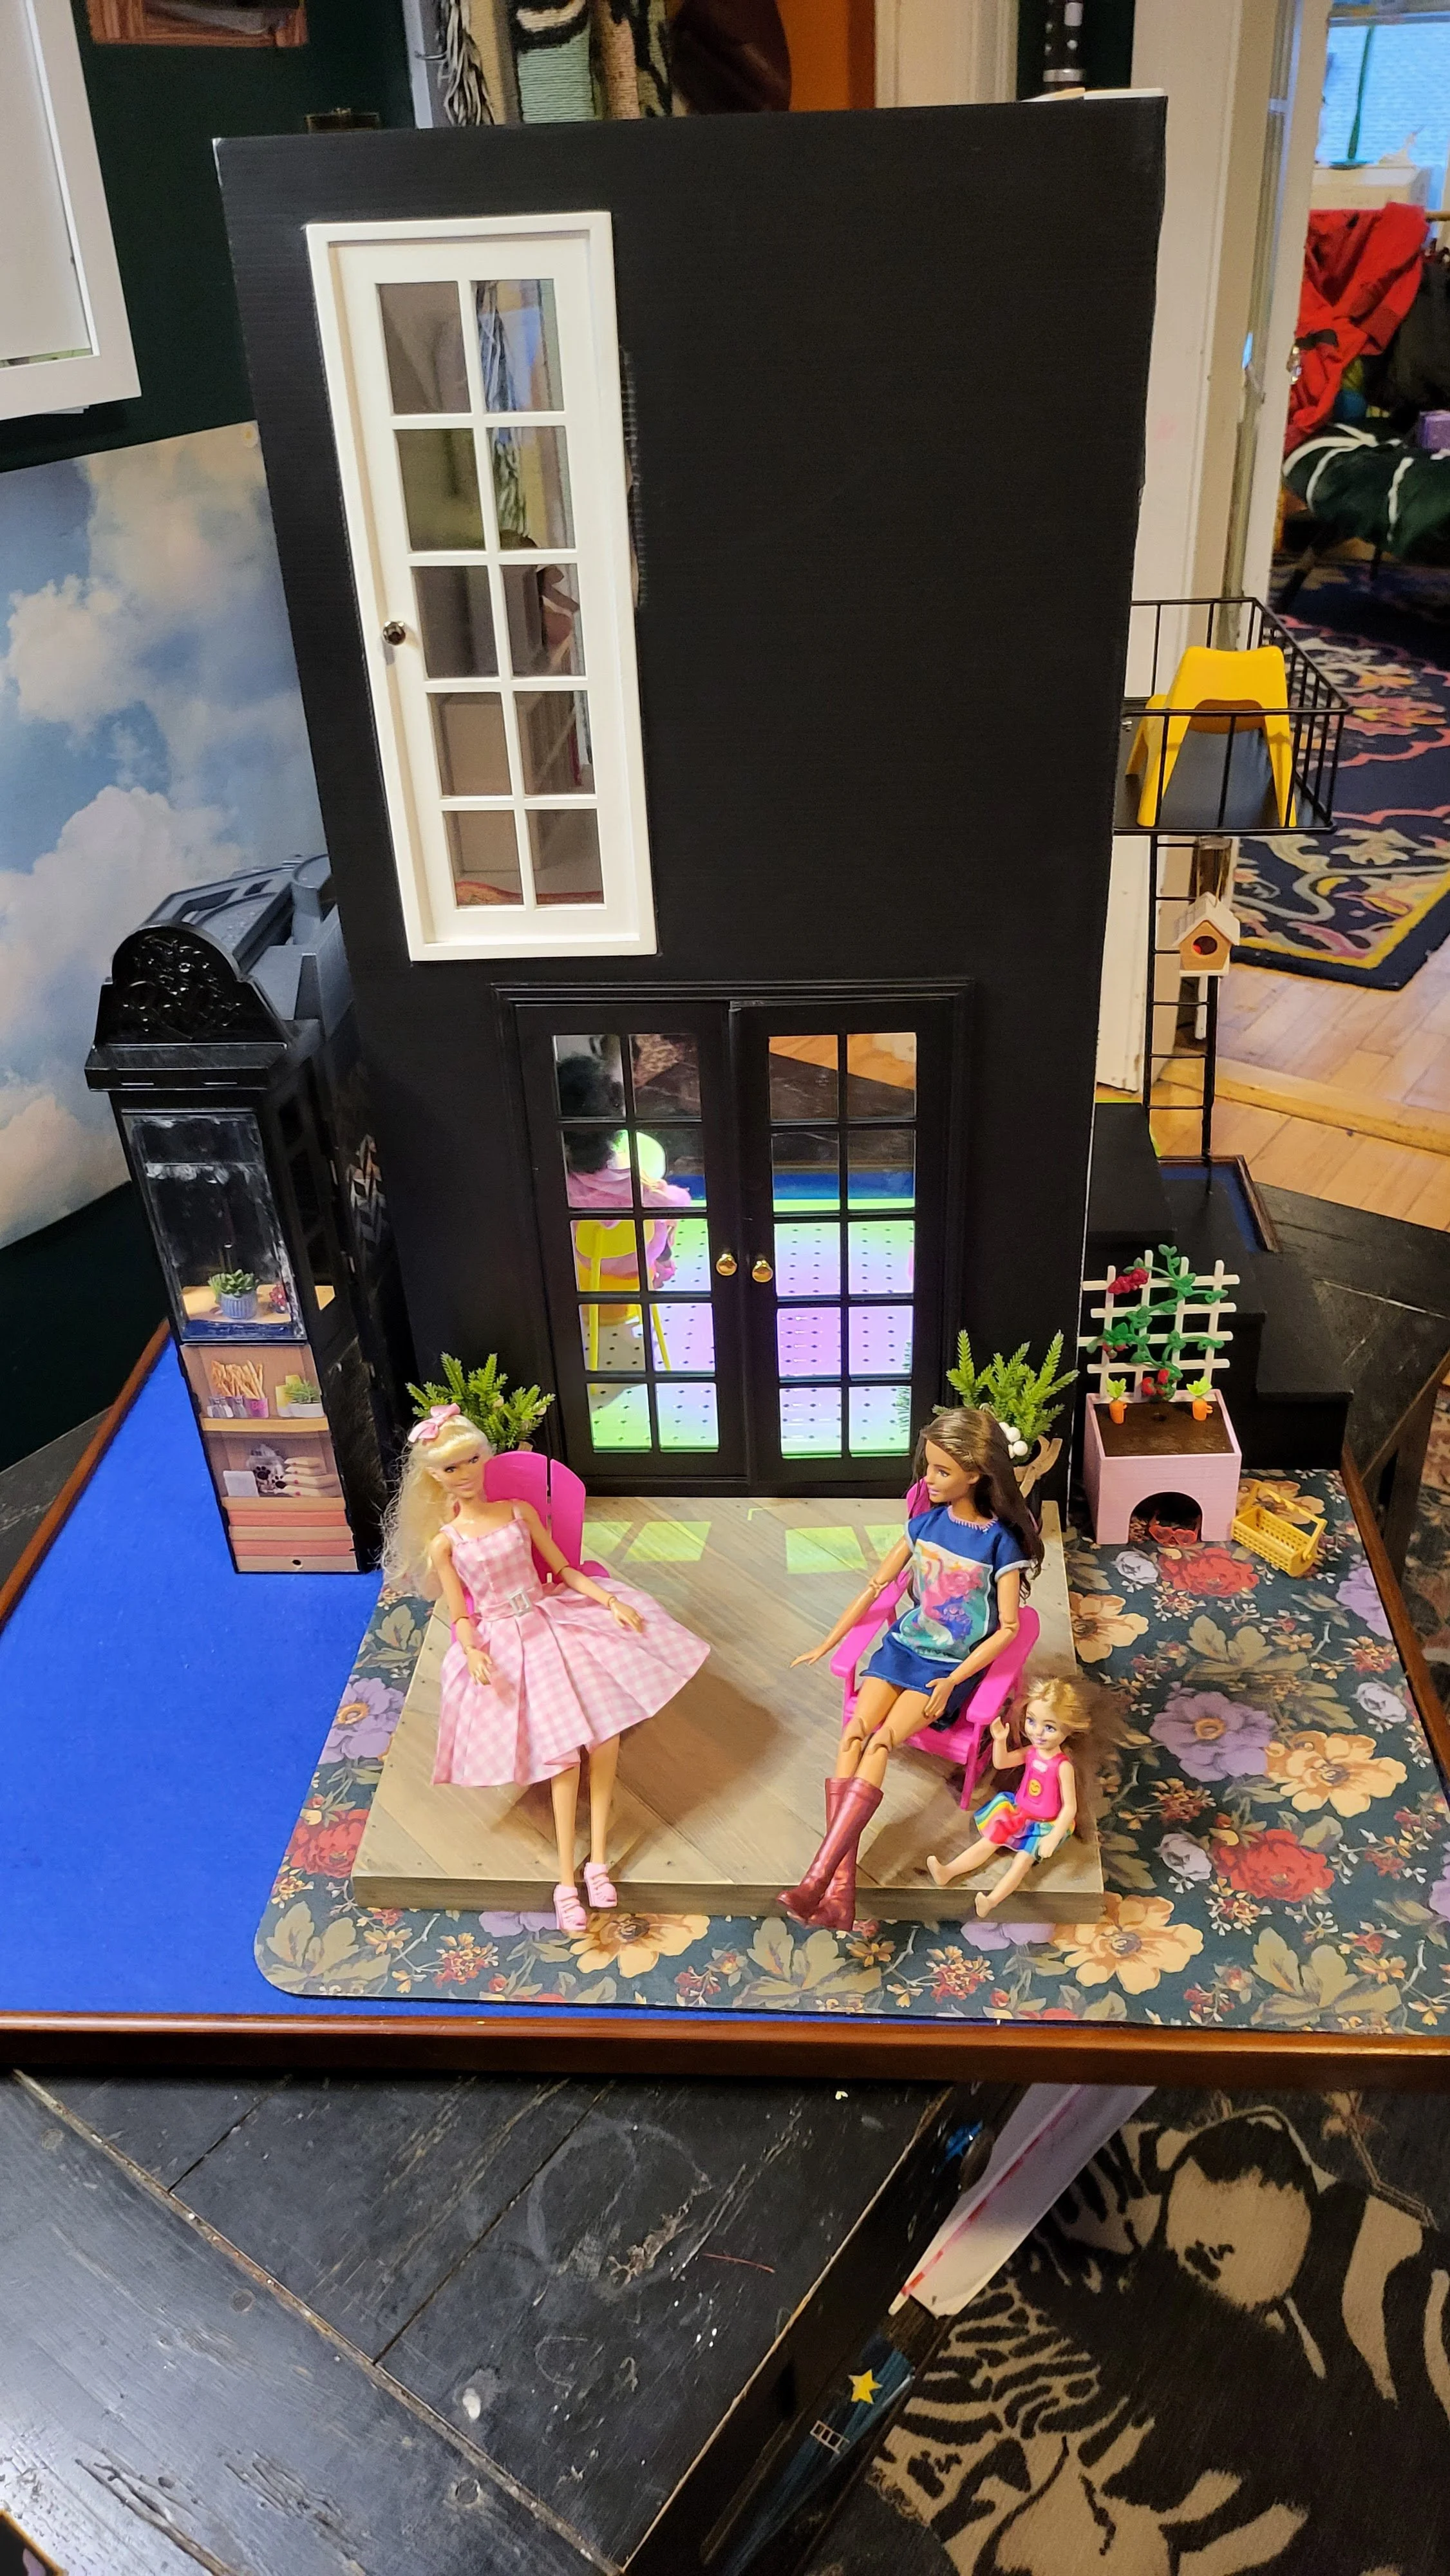
These units themselves don't need much love to start creating your DIY dollhouse, but I want to share how I created exterior faces (in two colors) in order to provide some dust-proofing and realism charm to create my own condominium dollhouse!

Supplies used:
One Brightroom 13" x 2 cube shelving units - I paid $40 at Target
2 Corrugated plastic boards, 20" x 30" - I used one black and one white, getting an extra sheet or two is recommended (or template on a standard foam core board) - $5.99 each at Michaels
Velcro sticky back tape roll - A roll is recommended, your choice of color. I went with white to match the shelf - 6' x 1/2" - about $8 at Walmart
I found some acrylic panes in the clearance section at Michaels for large windows
1:6 scale French Doors - I have purchased several from GiftyGarden on Etsy (in black, white, and some single doors - hardware included!)
A heavy duty, multi material transparent glue like E600 or QuickHold All Purpose Water Resistant Adhesive
Decorative stickers or wall clings, to your liking. I splurged on Wallshoppe's Miniature 1:6 Scale Barbie Wallpaper DIY Kit which gave me some leverage in clipping out art for the walls as well as standard wallpaper styles
Battery operated push light - I found one for $3.25 at FiveBelow
X-acto knife or box cutter
Ruler
The Draft and Build Process
To start - after assembling my storage unit, of course, I traced the openings and shelf crossing areas onto a large piece of newsprint and measured the opening and top/bottom heights of my cube unit. I wanted to be sure of where to cut to place the double french doors - as there was little vertical wiggle room - and where to place my velcro tape.
Once measurements were complete, I started by using pencil to mark out the exact places to cut out for my doors, view window, and velcro tape placement. Again the doors I was working with had a very slim margin of error vertically to fit with the trim area, so I triple checked the measurements for this one.
Using my x-acto knife, I carefully cut out along the marked lines. Because of the vertical corrogation of this plastic board, this went MUCH more smoothly in one direction than the other. I used a metal ruler for the opposite-the-corrogation cuts to keep me level.
From here, everything should start to slide into place pretty snugly. Once I confirmed my doors and windows fit comfortably, I used my heavy duty multi-surface glue to hold everything into place.
Next, I added the velcro strip to my shelf and to the marked out areas on the back of each panel. I used the floor to level my panels as I added them on (removably, thanks to velcro!) to my shelves!